
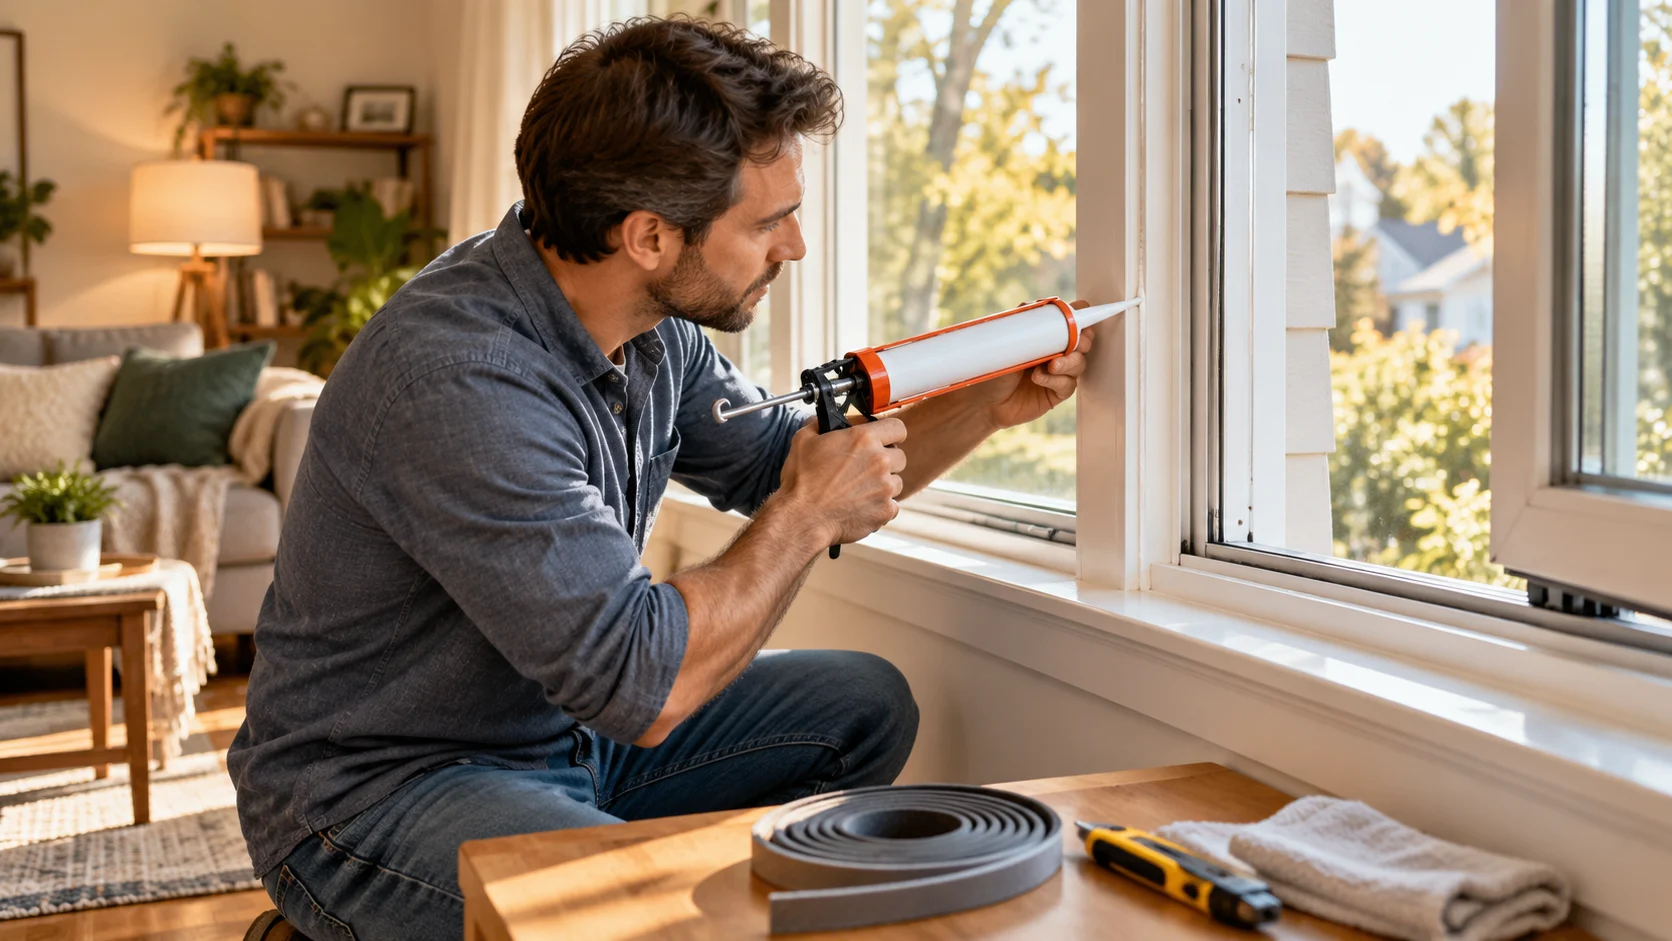
Drafty windows can make your home uncomfortable, increase heating and cooling expenses, and allow unwanted outdoor air to enter your living spaces. Over time, window seals, caulking, and weatherstripping can wear out, creating small gaps around frames and moving parts. Fortunately, learning how to reseal windows and stop drafts can help improve indoor comfort without replacing every window in your home.
Resealing windows is a practical home improvement project that many homeowners can complete using basic tools and suitable sealing materials. The process involves identifying air leaks, removing damaged sealant, applying fresh caulk, and replacing worn weatherstripping where necessary. This guide explains how to seal drafty windows, choose appropriate products, avoid common mistakes, and maintain energy-efficient windows throughout the year.
Why Windows Develop Drafts and Air Leaks
Windows develop drafts when unwanted outdoor air enters through gaps around the frame, sash, or surrounding wall. These openings may appear as sealing materials deteriorate, window components shift, or building materials expand and contract with temperature changes. Even relatively small gaps can allow noticeable airflow, particularly during windy weather or when indoor and outdoor temperatures differ.
Aging caulk is one of the most common causes of window air leaks because it can shrink, crack, or separate from surrounding surfaces. Weatherstripping may also lose its flexibility after repeated use, preventing movable window sections from closing tightly. Poor installation, damaged frames, and loose hardware can create additional openings that ordinary cleaning cannot resolve.
Not every cold sensation near a window indicates an actual air leak, since cold glass can also produce uncomfortable air movement indoors. Single-pane windows and poorly insulated glazing may feel drafty even when their seals remain intact. Identifying the real source of discomfort helps homeowners choose the right solution instead of applying unnecessary sealing products.
How to Find Air Leaks Around Your Windows
The first step in resealing drafty windows is identifying where outside air enters the room. Begin by examining the window frame, interior trim, sash edges, and visible joints for cracks or deteriorating sealant. Look for gaps, peeling caulk, loose weatherstripping, and areas where the window no longer fits evenly against its frame.
On a windy day, carefully move your hand near the window edges to check for noticeable air movement. You can also hold a lightweight tissue close to suspected gaps and observe whether it moves consistently. Keep windows closed during this inspection, and avoid using open flames because curtains, drafts, and nearby materials can create fire hazards.
A professional energy assessment may provide additional information when drafts are difficult to locate. Technicians sometimes use blower door testing or thermal imaging to identify air leakage patterns and insulation problems. These methods can help distinguish between window frame leaks, surrounding wall gaps, and heat loss through the glass itself.
Gather the Tools and Materials for Window Resealing
Preparing the correct tools before beginning can make window resealing easier and produce a cleaner finished result. Common supplies include a caulking gun, compatible window sealant, utility knife, plastic scraper, microfiber cloth, and suitable cleaning materials. Depending on the window design, you may also need replacement weatherstripping, a measuring tape, and painter’s tape.
Choose sealing materials according to the location and movement of the window components. Exterior window joints generally require weather-resistant sealant approved for the frame and surrounding materials, while some interior joints may need paintable caulk. Weatherstripping is designed for movable sections and should not be replaced with permanent caulk that prevents normal window operation.
Read product labels carefully before applying any sealant or adhesive to your windows. Manufacturers specify suitable temperatures, surface preparation, curing times, and material compatibility, all of which affect performance. Wear appropriate protective equipment when handling sharp tools or cleaning products, and use safe access methods when working near elevated windows.
Step 1: Remove Old Caulk and Damaged Sealing Materials
Removing deteriorated caulk is an important preparation step because fresh sealant needs a sound surface to bond properly. Begin by examining the existing bead for cracks, loose sections, and areas where the material has separated from the window frame. Use a suitable scraper or carefully handled utility knife to remove damaged sealant without scratching surrounding surfaces.
Work slowly around the frame, particularly near painted wood, vinyl, or delicate trim that can be damaged by sharp tools. If the old caulk is difficult to remove, consult the sealant manufacturer’s guidance for compatible removal products. Avoid aggressive scraping, excessive force, or chemical cleaners that could damage the window finish or nearby building materials.
After removing the damaged material, inspect the exposed joint for signs of rot, moisture damage, or unusual movement. Soft wood, persistent dampness, and significantly separated frame components may require repairs before new sealant is applied. Covering these problems with caulk alone will not correct the underlying damage and may make future inspection more difficult.
Step 2: Clean and Dry the Window Frame Thoroughly
A clean surface helps new window sealant adhere correctly and maintain a durable connection with the surrounding materials. Use a soft cloth and an appropriate cleaner to remove dust, grease, and loose debris from the prepared joint. Choose cleaning products compatible with the frame material, especially when working with painted wood, aluminum, or vinyl.
After cleaning, wipe away any remaining residue according to the product instructions. Allow the surface to dry completely before applying sealant because trapped moisture can interfere with adhesion and contribute to future deterioration. Pay particular attention to corners and recessed joints where water may collect or remain hidden after ordinary cleaning.
While the surface dries, examine the gap width and determine whether additional joint preparation is necessary. Wide or deep stationary joints may need a suitable backer rod to support the sealant and control its depth. Following the caulk manufacturer’s joint-size recommendations helps prevent weak seals and excessive material use.
Step 3: Apply New Caulk Around Stationary Window Joints
Once the window frame is clean and dry, prepare your chosen caulk according to the manufacturer’s instructions. Cut the applicator nozzle to create an opening suitable for the joint width, then place the cartridge in a caulking gun. Test the flow on a disposable surface before applying sealant around the window.
Position the nozzle against the stationary joint between the window frame and surrounding trim or wall. Apply a continuous, controlled bead that fills the gap without spreading excessively onto nearby surfaces. Maintain steady pressure as you move along the joint, paying particular attention to corners and transitions where air leakage commonly develops.
Smooth the fresh sealant using a manufacturer-approved finishing tool or another recommended method before it begins forming a skin. Remove painter’s tape promptly if you used it to protect adjacent surfaces. Allow the sealant to cure for the specified period, and avoid disturbing the joint before the material reaches its intended performance.
Step 4: Replace Worn Window Weatherstripping
Weatherstripping helps seal the moving sections of windows while allowing them to open and close normally. Over time, foam, rubber, vinyl, or brush-style seals can become flattened, cracked, or detached. Replacing damaged weatherstripping can reduce drafts around window sashes that cannot be permanently sealed with ordinary caulk.
Start by identifying the existing weatherstripping type and measuring the length of each section requiring replacement. Carefully remove the old material according to the window manufacturer’s instructions, then clean the installation area. Select a compatible replacement with the correct thickness and profile so the window can close securely without excessive resistance.
Install the new weatherstripping along the designated contact surfaces, making sure the material remains continuous around the required edges. Avoid stretching adhesive-backed strips during installation because they may shrink away from corners later. After installation, operate the window several times to confirm that it closes properly and that the locking hardware engages without difficulty.
Step 5: Seal Gaps Between Window Trim and Walls
Air leaks sometimes develop around the interior window trim rather than the window itself. These gaps can occur when building materials shift, previous sealant deteriorates, or the surrounding installation space was not properly sealed. Inspect the joints where the trim meets the wall and where separate trim pieces connect.
Small stationary gaps may be suitable for a compatible paintable caulk after the surfaces have been cleaned and prepared. Apply a neat bead along the affected joint and smooth it according to the product instructions. Avoid applying sealant over damaged plaster, damp wood, or loose trim before addressing those underlying problems.
Larger hidden gaps behind the trim may require specialized air-sealing materials instead of a simple surface caulk bead. In certain installations, professionals use low-expansion foam specifically approved for windows and doors to avoid distorting the frame. If significant air leakage remains after surface sealing, a qualified contractor can assess the surrounding installation cavity.
Step 6: Check Window Locks, Hinges, and Sash Alignment
Window hardware can influence how effectively the sash seals against the surrounding frame. Loose hinges, worn locks, and misaligned components may prevent weatherstripping from making even contact. As a result, drafts can continue even when the sealing materials are relatively new and in good condition.
Inspect the visible hardware for loose fasteners, damaged parts, and signs of uneven movement. Operate the window slowly to check whether the sash closes evenly and the locking mechanism engages normally. Follow the manufacturer’s maintenance instructions for any minor adjustments, and avoid forcing hardware that appears bent or damaged.
If a window remains difficult to close or shows significant frame movement, professional adjustment may be necessary. Repeatedly applying thicker weatherstripping can make an alignment problem worse by increasing pressure on the hardware. Correcting the fit of the window helps the seals perform as intended while preserving normal operation and security.
Step 7: Test Your Windows After Resealing
After allowing the sealant to cure and replacing damaged weatherstripping, inspect the completed work for gaps or uneven sections. Check that stationary joints are covered continuously and that no sealant blocks drainage openings. Look closely at corners because these areas can be overlooked during installation and may continue allowing unwanted airflow.
Repeat your draft inspection under suitable conditions using a lightweight tissue or another safe method. Compare the results with the areas that previously showed noticeable air movement. Remember that temperature differences near the glass may still create a cool sensation even when the surrounding joints have been sealed successfully.
Open and close each operable window several times to confirm that the new materials do not interfere with movement. Test locks, handles, and emergency escape functions where applicable. If drafts remain noticeable, the problem may involve glazing, installation gaps, or other building components that require additional evaluation.
Common Window Resealing Mistakes to Avoid
Applying new caulk directly over loose or deteriorated sealant is a common mistake that can weaken the finished repair. The new material may initially appear to cover the gap, but poor adhesion can cause separation over time. Removing damaged material and preparing the surface properly helps produce a more reliable seal.
Another mistake is using the wrong product for the window material or application. Interior caulk may not withstand outdoor weather, while some sealants are unsuitable for painted surfaces or specific plastics. Applying permanent caulk to movable joints can also prevent windows from opening and create problems with ventilation or emergency escape.
Homeowners should never block weep holes or other drainage openings designed to release water from the window assembly. These openings help manage moisture and must remain functional after resealing. Applying excessive sealant, ignoring curing instructions, and sealing over existing water damage can create additional problems rather than improving window performance.
How Window Resealing Can Improve Energy Efficiency
Air leaks around windows can increase the amount of heated or cooled indoor air exchanged with the outdoors. During winter, unwanted cold air may contribute to discomfort, while summer drafts can interfere with indoor temperature control. Reducing these leaks can help heating and cooling systems maintain more consistent indoor conditions.
Properly sealed windows may also improve comfort by reducing noticeable airflow near seating areas, beds, and workspaces. However, resealing does not change the insulating performance of the window glass itself. If a window has inefficient glazing or a failed insulated glass unit, additional repairs or replacement may be needed to address those separate concerns.
Energy savings depend on several factors, including the original leakage, local climate, insulation levels, and household heating or cooling patterns. A small sealing repair will not necessarily produce a dramatic reduction in energy bills. Nevertheless, addressing genuine air leaks can be a useful part of a broader home energy-efficiency improvement plan.
When to Repair or Replace Drafty Windows
Resealing is often appropriate when the window frame remains structurally sound and the main problems involve worn caulk or weatherstripping. Minor gaps around stationary joints and moving sashes can frequently be addressed without replacing the entire unit. This makes targeted repairs a practical starting point for many otherwise functional windows.
Window replacement may deserve consideration when frames are severely warped, rotten, or damaged beyond reliable repair. Persistent moisture between panes of an insulated glass unit may also indicate a failed glazing seal, which exterior caulking cannot restore. Significant structural deterioration or repeated water intrusion requires a more comprehensive assessment.
A qualified window professional can help distinguish repairable sealing problems from issues that require replacement components or new windows. Comparing repair costs, frame condition, comfort improvements, and long-term performance can guide the decision. Replacing a functioning window solely because of a minor draft may be unnecessary when a compatible sealing repair would address the cause.
Maintain Window Seals and Prevent Future Drafts
Regular inspections can help identify deteriorating window seals before noticeable drafts or moisture problems develop. Examine exterior caulk, interior joints, weatherstripping, and window hardware at least periodically, especially after severe weather. Look for cracks, peeling materials, loose sections, or areas where the seal has separated from the surrounding surface.
Keep window tracks and drainage openings clear of dirt, leaves, and accumulated debris. Use cleaning products recommended for the frame material, and avoid abrasive methods that could damage protective finishes or flexible seals. Proper maintenance helps window components move smoothly and supports the performance of existing weatherstripping.
Address small gaps and damaged seals promptly rather than allowing them to worsen through repeated exposure to weather. Maintain suitable indoor ventilation, and investigate unexplained condensation or water intrusion instead of simply covering affected areas. Consistent maintenance can extend the usefulness of window sealing materials and help keep indoor spaces comfortable throughout the year.
Conclusion
Learning how to reseal windows and stop drafts is a practical way to improve indoor comfort and address unwanted air leakage. The process begins with identifying the source of the draft, removing deteriorated materials, and preparing the window surfaces. Applying compatible caulk and replacing worn weatherstripping can help restore effective seals around suitable window joints.
Successful window resealing requires careful attention to material compatibility, proper application, and normal window operation. Avoid blocking drainage openings, sealing moving components permanently, or covering structural damage with cosmetic repairs. Testing the window after completing the work helps confirm whether the original air leakage has been reduced.
Regular maintenance and timely repairs can help prevent future drafts and keep window components working properly. However, severely damaged frames, failed insulated glass units, and hidden installation problems may require professional assessment. With suitable materials and a careful approach, many drafty windows can become more comfortable and efficient without a complete replacement.
FAQs
What is the best way to reseal drafty windows?
Identify the air leaks, remove deteriorated caulk, clean the surfaces, and apply compatible window sealant to stationary gaps. Replace worn weatherstripping around movable sections, then test the window after installation.
Can you reseal windows without replacing them?
Yes, many window drafts can be reduced by renewing caulk, replacing weatherstripping, or correcting minor hardware problems. However, damaged frames and failed insulated glass units may require more extensive repairs or replacement.
What type of caulk is best for sealing windows?
The best caulk depends on the frame material and location of the joint. Exterior applications generally need weather-resistant, compatible sealant, while some interior joints benefit from paintable products.
How often should window seals be replaced?
There is no universal replacement schedule because seal lifespan depends on material quality, weather exposure, and window use. Inspect seals periodically and replace them when they crack, detach, lose flexibility, or stop sealing effectively.
Does resealing windows help reduce energy bills?
Resealing genuine air leaks can reduce unwanted airflow and may lower heating or cooling demand. Actual savings depend on the home’s condition, climate, existing leakage, and overall insulation performance.