
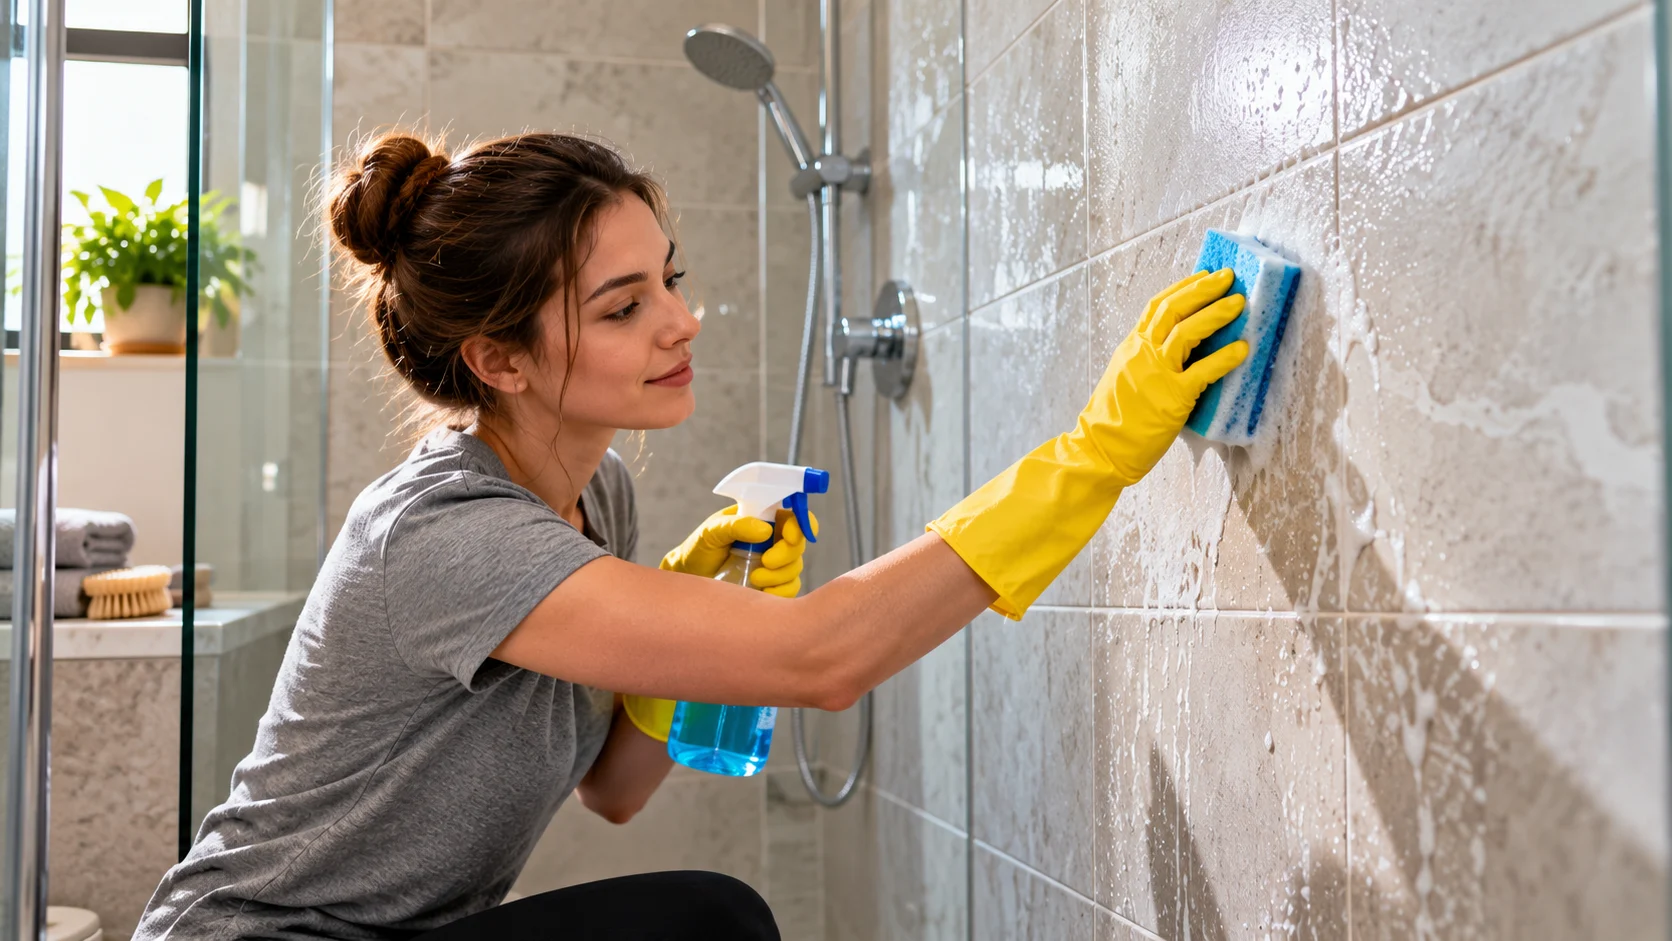
Cleaning shower tiles is an important part of keeping your bathroom fresh, hygienic, and comfortable. Over time, shower walls and floors can collect soap scum, hard water stains, dirt, and mildew. These deposits can make even beautiful bathroom tiles look dull and neglected. Fortunately, regular cleaning and the right techniques can help restore their appearance without unnecessary scrubbing.
Learning how to clean shower tiles properly can save time and protect your bathroom surfaces from avoidable damage. Different tile materials require different cleaning methods, so choosing suitable products is essential. Ceramic, porcelain, and natural stone tiles may look similar, but they do not always respond to cleaning solutions in the same way.
This simple guide explains how to clean shower tiles, remove common stains, maintain grout lines, and prevent buildup. You will also discover practical cleaning tools, tile-safe cleaning solutions, and maintenance tips. Whether you are dealing with soap residue or stubborn mineral deposits, these methods can help keep your shower looking its best.
Why Do Shower Tiles Get Dirty?
Shower tiles become dirty because they are regularly exposed to water, soap, shampoo, body oils, and other bathroom products. When these substances combine, they can create a sticky residue known as soap scum. This buildup collects on tile surfaces, grout lines, and shower corners. Over time, it becomes more noticeable and difficult to remove.
Hard water is another common cause of dirty-looking shower tiles. Water containing dissolved minerals can leave deposits behind as droplets evaporate. These deposits may appear as cloudy white marks or rough patches on tile surfaces. Regular exposure allows mineral buildup to accumulate, particularly around faucets and areas where water frequently splashes.
Moisture and limited ventilation can also create conditions that encourage mold and mildew growth. Grout lines and corners are particularly vulnerable when they remain damp for extended periods. Poor cleaning habits can make these problems worse. Understanding the causes of buildup helps you choose effective cleaning methods and prevent recurring stains.
What Do You Need to Clean Shower Tiles?
Cleaning shower tiles usually requires only a few basic household tools and suitable cleaning products. A soft sponge, microfiber cloth, nonabrasive brush, and bucket are useful for removing everyday dirt. A mild bathroom cleaner or pH-neutral tile cleaner can help loosen soap residue. Choosing gentle materials reduces the risk of scratching decorative surfaces.
A soft-bristled grout brush can help clean narrow spaces between tiles without damaging the surrounding material. For larger tiled walls, a microfiber mop or long-handled cleaning tool may make the job easier. Rubber gloves can protect your hands from prolonged exposure to cleaning products. Good ventilation is also important when using bathroom cleaners.
Before starting, check the manufacturer’s recommendations for your specific tile and grout materials. Natural stone, polished finishes, and certain grout sealers may require specialized products. Avoid abrasive powders, metal brushes, and harsh chemicals unless explicitly approved for the surface. Using appropriate supplies helps maintain the appearance and condition of your shower.
How to Clean Shower Tiles Step by Step
Start by removing shampoo bottles, soap containers, and other accessories from the shower area. This allows you to reach tile surfaces that are normally covered by bathroom products. Rinse the tiles with lukewarm water to remove loose dirt and soften surface residue. Check the walls and floor for areas with heavy buildup.
Next, apply a tile-compatible bathroom cleaner according to its label instructions. Allow the product to remain on the surface for the recommended contact time without letting it dry. Gently scrub the tiles with a soft sponge or nonabrasive brush, concentrating on visible soap scum. Work in manageable sections to keep the cleaning process organized.
After scrubbing, rinse the tiles thoroughly with clean water to remove loosened residue and cleaning products. Use a microfiber cloth or squeegee to remove remaining moisture from the surface. Pay attention to corners and grout lines where water can collect. Proper drying helps reduce water spots and slows the return of buildup.
How to Remove Soap Scum From Shower Tiles
Soap scum forms when soap residues interact with minerals in water and oils from everyday bathing products. It often creates a cloudy or sticky film on shower walls. The buildup can become difficult to remove when left untreated for long periods. Regular cleaning prevents layers of residue from becoming firmly attached to the surface.
For ceramic or porcelain tiles, use a cleaner specifically formulated to remove bathroom soap scum. Apply the product according to its instructions and allow enough time for the residue to loosen. Gently scrub with a non-scratch sponge and rinse thoroughly. Repeat the process if necessary rather than using excessive force.
Natural stone tiles require extra care because many common soap scum removers contain acidic ingredients. Products containing vinegar or other acids can damage marble, limestone, and certain stone finishes. Choose a cleaner explicitly approved for the specific stone type. Testing a small, inconspicuous area first can help prevent unexpected discoloration or surface damage.
How to Clean Shower Tile Grout
Grout lines often collect more visible dirt than the surrounding tiles because their surfaces can be textured or porous. Soap residue, moisture, and everyday grime may settle into these narrow joints. This can make grout appear darker or unevenly colored. Cleaning grout regularly helps maintain the overall appearance of the tiled shower.
Begin by applying a grout-safe cleaner to the affected areas and following the recommended contact time. Use a soft or medium-soft grout brush to gently loosen surface dirt without removing grout material. Scrub carefully along the lines rather than pressing aggressively against the joints. Rinse away the cleaner and loosened debris with clean water.
If grout remains discolored, determine whether the problem is ordinary staining, mildew, or damaged grout. Deep stains may require a specialized grout cleaner, while cracked or missing grout needs repair. Avoid scraping the joints with sharp tools because this can weaken the material. Proper maintenance helps preserve both appearance and water resistance.
How to Clean Ceramic Shower Tiles
Ceramic shower tiles are popular because they offer a durable surface that is generally easy to maintain. Many glazed ceramic tiles resist ordinary moisture and surface staining. However, soap residue and mineral deposits can still accumulate with regular use. Consistent cleaning helps preserve their finish and prevents stubborn buildup.
Use warm water and a mild, tile-compatible cleaning solution for routine maintenance. Gently wipe the tiles with a microfiber cloth or soft sponge, paying attention to textured areas. For heavier soap scum, select a cleaner approved for glazed ceramic surfaces. Avoid rough scrubbing pads that may scratch the glaze or damage decorative finishes.
After cleaning, rinse thoroughly and dry the surface to prevent new water spots. Inspect the grout and sealant around the tiles for signs of wear or damage. Even when ceramic tile surfaces resist moisture, their surrounding joints still require attention. Keeping these areas clean helps maintain a more attractive and functional shower.
How to Clean Porcelain Shower Tiles
Porcelain tiles are commonly used in showers because they are dense, durable, and available in many finishes. Their relatively low water absorption makes them suitable for wet environments when installed correctly. However, surface texture can influence how easily dirt and soap residue accumulate. Matte and textured porcelain may require more attention than smooth glazed varieties.
For everyday cleaning, use a pH-neutral cleaner or another product recommended for the porcelain finish. Apply the cleaning solution with a soft cloth or nonabrasive sponge. Textured surfaces may benefit from gentle brushing to release dirt trapped in small grooves. Avoid aggressive cleaning tools that could affect specialized coatings or polished finishes.
Rinse the tiles carefully to remove all cleaning residue and allow them to dry. Remaining detergent can leave streaks or attract additional dirt over time. Pay particular attention to textured shower floors, which may hold moisture longer. Routine maintenance helps porcelain retain its appearance without requiring harsh cleaning methods.
How to Clean Natural Stone Shower Tiles
Natural stone tiles can create an elegant bathroom appearance, but they often require more careful maintenance than ceramic or porcelain. Marble, limestone, travertine, and other stones have different levels of porosity and chemical sensitivity. Some surfaces can be etched by acidic cleaning products. Choosing the correct cleaner is essential for protecting their finish.
Use a pH-neutral product specifically labeled as safe for your stone type and any existing sealer. Apply it with a soft cloth or sponge, following the manufacturer’s instructions. Avoid vinegar, lemon juice, and acidic bathroom descalers unless the stone manufacturer explicitly approves their use. Gentle cleaning is particularly important on polished stone surfaces.
After washing, rinse and dry the tiles thoroughly to reduce moisture and mineral marks. Some stone installations require periodic sealing, depending on the material and installation specifications. Sealers do not make stone completely waterproof or eliminate the need for cleaning. Following professional care recommendations helps preserve natural stone over time.
How to Remove Hard Water Stains From Shower Tiles
Hard water stains usually appear as white, cloudy, or chalky deposits on shower tiles and fixtures. These marks develop when water evaporates and leaves minerals behind. They are especially common in bathrooms with mineral-rich water supplies. Regular cleaning can help prevent thick deposits from forming.
For compatible glazed ceramic or porcelain surfaces, use a tile-approved mineral deposit remover according to its label. Some products contain acidic ingredients that dissolve mineral buildup, making surface compatibility especially important. Keep the cleaner away from materials that may be damaged by it. Never combine a descaling product with bleach or other cleaning chemicals.
If your shower contains natural stone, use a mineral stain treatment specifically approved for that material. Ordinary acidic descalers can permanently damage sensitive surfaces. After removing deposits, rinse the tiles thoroughly and dry them with a soft cloth. Frequent drying can significantly reduce the formation of new water spots.
How to Remove Mold and Mildew From Shower Tiles
Mold and mildew can develop in showers when moisture remains on surfaces for extended periods. They may appear as dark spots or patches around grout lines, corners, and sealant. Poor ventilation and persistent dampness increase the likelihood of recurring growth. Addressing moisture problems is an important part of managing these stains.
For small surface areas, use an appropriate bathroom cleaner labeled for the affected material and follow its safety directions. Wear protective gloves, provide ventilation, and avoid creating airborne dust or residue through aggressive scrubbing. Never mix bleach with vinegar, ammonia, acids, or other cleaners. Chemical combinations can release dangerous gases.
If mold repeatedly returns, examine the area for damaged grout, leaking plumbing, or moisture trapped behind surfaces. Large areas of growth or suspected hidden contamination may require professional remediation. Simply cleaning visible spots will not resolve ongoing water intrusion. Correcting the moisture source is essential for preventing the problem from continuing.
How to Clean Shower Floor Tiles
Shower floor tiles often collect more dirt because water, soap residue, and debris naturally move downward. Textured floor tiles may also trap grime within small grooves. Regular cleaning helps prevent slippery buildup and maintains a more hygienic surface. Special attention should be given to areas around the drain.
Begin by removing loose hair and debris before applying a floor-compatible cleaning solution. Allow the cleaner to work according to its instructions, then gently scrub with a suitable brush. Avoid tools that could scratch the tile or damage grout joints. Rinse thoroughly to remove any detergent film that might leave the floor slippery.
After cleaning, allow the floor to drain and dry as completely as practical. Check whether water remains pooled in certain areas, which could indicate drainage or installation problems. Persistent standing water can encourage buildup and moisture damage. Maintaining a clear drain and clean surface helps keep the shower more comfortable and safe.
How to Clean Shower Tiles Without Scrubbing Hard
Not every shower cleaning task requires intense physical scrubbing or abrasive tools. Often, allowing an appropriate cleaner enough contact time can loosen soap residue and everyday grime. This reduces the effort needed to wipe the tiles clean. Selecting the right product is usually more effective than applying excessive pressure.
Start by rinsing the surface and applying a compatible cleaning solution as directed. Let the product work for the time stated on its label, then wipe with a soft microfiber cloth or sponge. For larger tiled walls, a long-handled cleaning tool can improve reach. Repeat gentle cleaning if necessary rather than forcing stubborn deposits away.
Maintaining a regular cleaning schedule also reduces the need for heavy scrubbing. Removing moisture and fresh soap residue before it hardens makes future cleaning easier. A simple rinse and squeegee after showering can help limit buildup. Consistent maintenance is often the easiest way to reduce cleaning time.
How Often Should You Clean Shower Tiles?
The ideal cleaning frequency depends on how often the shower is used, local water conditions, and ventilation. Bathrooms used by several people may collect soap residue more quickly than occasionally used showers. Hard water can also increase mineral deposits. Establishing a routine helps prevent dirt from becoming difficult to remove.
A quick rinse or squeegee after showering can reduce moisture and surface residue. For many households, a thorough tile cleaning approximately once a week is a reasonable starting point. Grout lines and corners may need additional attention when visible buildup appears. Adjust the schedule according to actual bathroom conditions.
Natural stone and specialized tile finishes may require different maintenance routines based on manufacturer guidance. Avoid using strong cleaners more frequently than recommended because unnecessary chemical exposure may affect surfaces. Regular gentle cleaning is generally preferable to infrequent aggressive treatment. Keeping a consistent schedule helps maintain a fresher bathroom with less effort.
Best Ways to Prevent Soap Scum and Water Stains
Preventing buildup is often easier than removing thick layers of soap scum and mineral deposits. One effective habit is rinsing shower walls after use to remove leftover shampoo and soap. A squeegee can then remove much of the remaining water. This simple routine helps reduce the deposits left behind as moisture evaporates.
Improving bathroom ventilation is another important step in controlling moisture. Run an exhaust fan during showering and afterward according to the fan manufacturer’s guidance. Where practical, allow fresh air to circulate without creating privacy or security concerns. Better ventilation helps surfaces dry and reduces conditions that encourage mildew growth.
Consider using appropriate storage shelves to keep bottles and toiletries away from constantly wet tile surfaces. Clean areas beneath containers regularly because trapped moisture and residue can accumulate there. A water-softening system may reduce mineral deposits in homes with consistently hard water. Combining these habits helps maintain cleaner shower tiles between deeper cleaning sessions.
Common Mistakes to Avoid When Cleaning Shower Tiles
One common mistake is using the same cleaning solution on every type of shower tile. Products that work well on glazed ceramic may damage natural stone or certain protective finishes. Acidic cleaners are particularly problematic for marble and limestone. Checking material compatibility before use helps prevent expensive surface damage.
Another mistake is scrubbing aggressively with steel wool, stiff metal brushes, or highly abrasive pads. These tools can scratch tile surfaces, weaken grout, and damage protective coatings. Excessive scrubbing may also make future cleaning more difficult by roughening the surface. Soft brushes and compatible cleaning products are usually better choices.
Mixing household cleaning chemicals is an especially dangerous mistake that should always be avoided. Bleach combined with acidic cleaners or ammonia can release hazardous gases. Use one product at a time and follow its instructions, including any required rinsing before switching products. Safe cleaning practices protect both the bathroom surfaces and the people using them.
When Should You Repair or Replace Shower Grout?
Cleaning can improve the appearance of grout, but it cannot repair joints that are cracked, loose, or missing. Damaged grout may allow moisture to move into areas that require proper waterproofing protection. Visible gaps and recurring deterioration suggest that maintenance is needed. Inspecting the condition of the joints is an important part of bathroom care.
Minor grout damage may be repairable using products compatible with the existing installation. The damaged material generally needs proper preparation before new grout is applied. However, persistent cracking can indicate movement or other underlying issues that should be investigated. Simply covering damaged grout without addressing the cause may lead to recurring problems.
If tiles feel loose, surrounding walls appear swollen, or water damage is suspected, seek professional assessment. A tiled shower depends on a properly designed waterproofing system beneath its visible finishes. New grout alone cannot repair a failed waterproof membrane. Timely attention to structural and moisture problems can prevent more extensive bathroom repairs.
Conclusion
Learning how to clean shower tiles properly makes it easier to maintain a fresh, attractive, and functional bathroom. Regular cleaning helps remove soap scum, mineral deposits, and everyday dirt before they become difficult to manage. The most effective approach depends on your tile material and the type of buildup present. Choosing compatible products protects the surfaces while improving their appearance.
Ceramic, porcelain, and natural stone tiles each require appropriate care to avoid unnecessary damage. Gentle cleaning tools, suitable bathroom products, and thorough rinsing can provide effective results for most routine tasks. Grout lines, corners, and shower floors also need consistent attention. Addressing moisture problems is especially important when mildew or mold keeps returning.
A clean shower is easier to maintain when you combine regular washing with simple preventive habits. Removing excess water, improving ventilation, and checking grout condition can reduce future cleaning work. Avoid harsh scrubbing and never mix incompatible cleaning chemicals. With a practical routine, your shower tiles can stay cleaner and more attractive for longer.
Frequently Asked Questions
What is the easiest way to clean shower tiles?
The easiest method is to apply a tile-compatible cleaner, allow it to work according to its instructions, and wipe with a soft sponge. Rinse thoroughly and dry the tiles afterward.
Can I use vinegar to clean shower tiles?
Vinegar may be suitable for certain acid-resistant ceramic or porcelain surfaces when approved by the manufacturer. Never use it on acid-sensitive natural stone such as marble or limestone.
How do you remove stubborn soap scum from shower tiles?
Use a soap scum remover approved for your tile material and follow its recommended contact time. Gently scrub with a nonabrasive sponge, rinse thoroughly, and repeat if needed.
How often should shower tiles be cleaned?
Weekly cleaning is a useful starting point for many households. Quickly rinsing and drying surfaces after showering can help prevent soap scum, mineral stains, and recurring moisture buildup.
Why do my shower tiles still look dirty after cleaning?
Remaining discoloration may come from mineral deposits, stained grout, leftover cleaning residue, or damaged surfaces. Identifying the cause helps determine whether additional cleaning or professional repair is necessary.